Unleash Brutal Energy: A Creator’s Guide to the Skyreaper Font
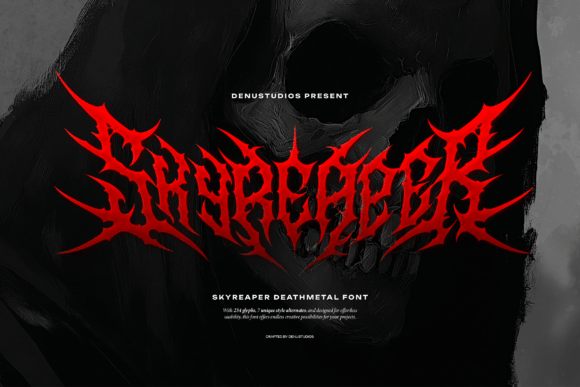
In the world of design, typography is often the silent storyteller, but there are times when you need the text to scream. If you are working on a project that demands intensity, darkness, and an unapologetic edge, standard sans-serifs or elegant scripts simply won’t cut it. Enter Skyreaper, a razor-sharp death metal font designed to bring chaotic elegance and brutal energy to your creative work. It is not merely a typeface; it is a visual weapon built for band logos, horror posters, album covers, and underground merchandise.
However, possessing a powerful tool is only half the battle. Many designers, from beginners to seasoned professionals, make critical errors when integrating extreme display fonts like Skyreaper into their projects. These mistakes can lead to illegible compositions, mismatched aesthetics, or a final product that feels amateurish rather than aggressive. To truly harness the power of this spiked typeface, you need to understand its nuances, avoid common pitfalls, and approach your layout with a strategic eye.
The Anatomy of Aggression: Understanding Skyreaper
Before applying Skyreaper to your canvas, it is vital to understand what makes it unique. This font features twisted, spiked letterforms that mimic the jagged aesthetic of black metal and horror iconography. It is not a standard text font; it is a display typeface intended for impact. With a comprehensive character set of 234 glyphs, it offers more than just standard letters. It includes a full range of punctuation and numerals, ensuring that your messaging remains complete even when the visual style is extreme.
What sets Skyreaper apart from generic "metal" fonts is the inclusion of 7 style alternates. These alternates allow for "maximum creative destruction," giving you the ability to swap out specific letters to create a more organic, hand-drawn, or chaotic look. This feature is crucial for avoiding the "copy-paste" look that plagues many logos. By mixing standard glyphs with alternates, you can craft a wordmark that feels unique and lethal.
Avoiding the "Ransom Note" Effect: Consistency and Selection
One of the most frequent errors designers make with complex typefaces is overusing the stylistic alternates without a plan. It is tempting to activate every spike and swirl available, but this often results in visual noise. When every letter is fighting for attention, the word becomes unreadable—a phenomenon often called the "ransom note" effect.
The Correction: Use the 7 style alternates in Skyreaper with surgical precision. A good rule of thumb is to focus on the first and last letters of a word, or perhaps the vowels, to create a flow without destroying the word structure. For example, if you are designing a logo for a band, use the alternates to connect difficult letter pairs (like T and O) or to add a specific flair to the capital letter, while keeping the rest of the word in the standard glyph set. This maintains the brutal aesthetic while ensuring the band's name is actually readable on a poster or t-shirt.
The Legibility Trap: Context is King
A common misunderstanding about death metal typography is that legibility is secondary to style. While this might be true for illegible band logos in the extreme metal underground, it is a fatal flaw for general design, marketing, or merchandise. If a potential customer cannot read the text on a t-shirt or a thumbnail, you have failed the primary function of design: communication.
The Correction: Evaluate the context of your project. Skyreaper is designed for headers, titles, and logos. Do not attempt to write a paragraph of product description or a long tagline using this font. The spiked details will blur together at small sizes, creating a dark, unreadable smudge.
Instead, use a hierarchy. Let Skyreaper be the dominant visual element for the main title, but pair it with a clean, legible serif or sans-serif font for the supporting text. This contrast actually enhances the "brutal" nature of Skyreaper by making the spikes stand out against a clean background. If you are creating a horror poster, use the font for the movie title, but ensure the screening times and location are in a typeface that people can actually decipher.
Color and Texture: Don't Let the Font Do All the Work
Another oversight is relying solely on the font's shape to carry the design. Black text on a white background can look stark and powerful, but it can also look flat and unfinished if the font is as detailed as Skyreaper. The twisted letterforms are designed to interact with texture.
The Correction: Consider the medium. If you are printing on merchandise, think about how the ink will sit on the fabric. Skyreaper pairs exceptionally well with distressed textures, grunge overlays, or subtle gradients that simulate rust or blood. However, be careful not to over-texture. If you apply a heavy grunge filter over a font that already has jagged edges, you risk losing the definition of the spikes.
A better approach is to use clipping masks. Place a texture layer on top of your text and clip it to the letter shapes. This allows the font to maintain its sharp, vector-based edges while gaining the gritty realism of a texture. This technique is essential for high-quality album covers and horror art.
Technical Considerations: Spacing and Kerning
Extreme fonts often come with default kerning (the space between letters) that is optimized for standard text. Because Skyreaper features irregular, spiked shapes, the default spacing might look uneven. You might notice that the space between an "A" and a "V" looks different than the space between an "H" and an "O."
The Correction: Never trust the default tracking on a display font. Once you have typed out your word, you must manually adjust the kerning. Zoom in close. Look for awkward gaps where letters don't touch, and look for collisions where spikes from one letter stab into the body of the next letter.
For a font like Skyreaper, a slight overlap is often desirable to create a cohesive logo mark, but it must be intentional. If you are using the font for a client project, convert the text to outlines (shapes) once the wording is finalized. This allows you to manually merge spikes or extend letterforms to create a truly custom lockup that no one else can replicate.
Pre-Flight Checklist: Before You Export
Before you finalize your design and send it to a printer or upload it to the web, run through a quick evaluation process to ensure you are using Skyreaper effectively.
- Scale Check: View your design at the size it will be seen. Does the horror poster look good as a thumbnail on a phone screen? Does the merch design hold up on a small chest print?
- Color Contrast: Ensure your background color doesn't swallow the font. High contrast is usually best for this style of typography.
- Alternate Review: Did you use the alternates? If the design feels static, swap a standard letter for an alternate to see if it improves the energy.
- File Format: If you are sending the file to a client who doesn't have the font installed, remember to outline your text or provide the font file (if the license permits) so the design renders correctly.
Conclusion: Mastering the Chaos
Skyreaper is a potent tool for any designer looking to inject their work with intensity and underground flair. It offers a robust set of glyphs and alternates that allow for genuine customization, setting it apart from lesser, generic horror fonts. By avoiding the common mistakes of over-styling, ignoring legibility, and neglecting manual kerning, you can transform this typeface from a simple font into a cornerstone of your visual identity. Approach it with respect, use its features intentionally, and you will achieve designs that are not just seen, but felt.